
If you have any questions about VersaTraction™ or Kahuna Grip™ installation please contact us for more information.
VersaTraction™ Watersports Traction Installation
1. Thoroughly clean, removing all wax, dirt, oil and grease from surface area where you will be applying your VersaTraction™ products. For best results apply a non-oil based solvent such as mineral spirts, paint thinner, or denatured alcohol to remove any residue. Repeat process if residue persists. Rub down with dry cloth and let dry completely. DO NOT USE SURF WAX REMOVER SOLVENTS THEY LEAVE A RESIDUE THAT DOES NOT ALLOW VERSATRACTION™ ADHESIVE TO STICK TO SURFBOARDS.
2. Place mat or tread in place. It helps to hold in place with blue painter’s tape. Peel the protective backing paper, exposing adhesive. Carefully place exposed adhesive edge to surface, and press down firmly.
3. Make sure that you try to eliminate as many air bubbles as possible by smoothing down product onto surface while applying. Rub into surface with your fingers, edge of your hand, soft plastic flat edge or graphics/decal application squeegee. Work from the center outwards slowly towards outside edges.
4. Maximize traction by cleaning entire surface with Comet brand (non-abrasive cleanser) and water-using a soft scrub brush.
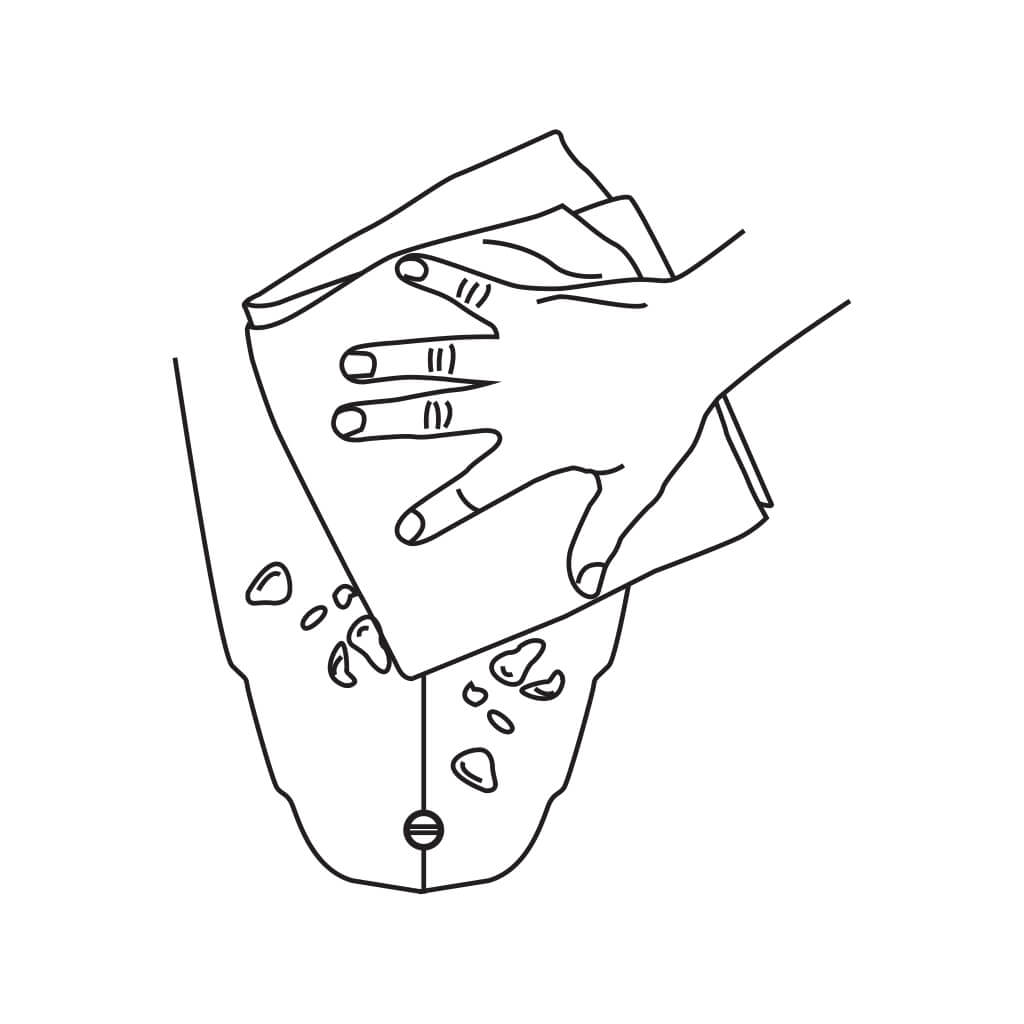
VersaTraction™ Step 1
With a clean towel/rag, clean surface removing all oil, dirt, wax, and grease. Then dry using towel/rag, make sure area has no residue present.
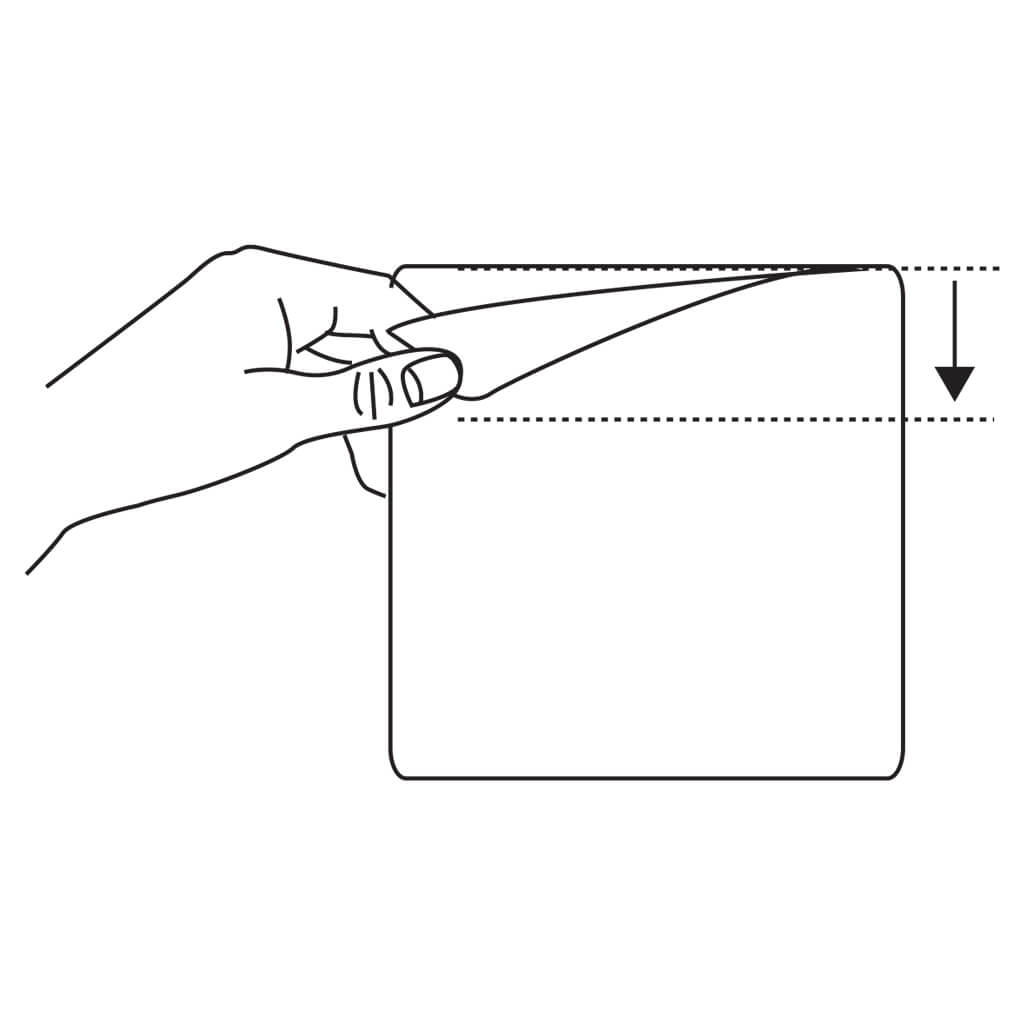
VersaTraction™ Step 2
Peel back easy peel backing 1-2 inches down the stringer (straightest edge) side of the kit piece.
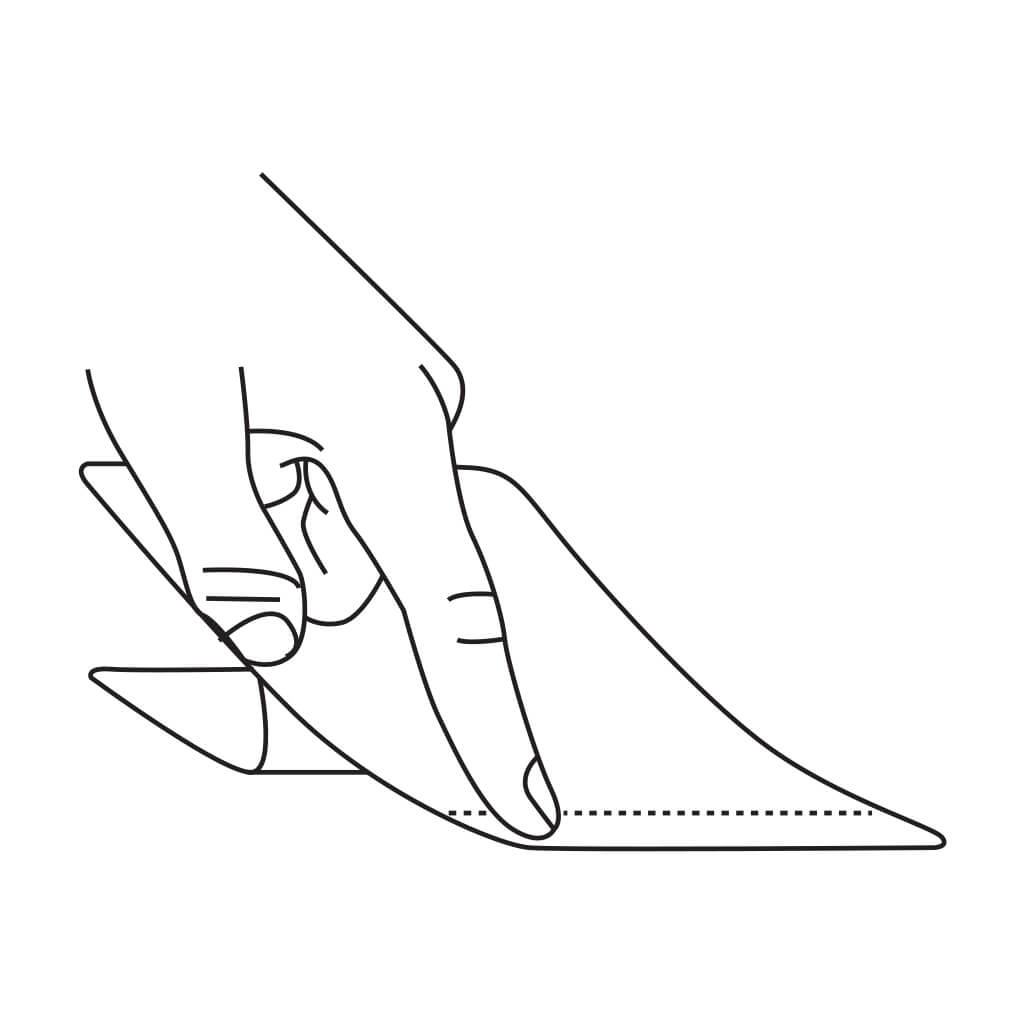
VersaTraction™ Step 3
Place exposed adhesive side on surface press down in place. Note: easiest to work from center of board out towards rails.
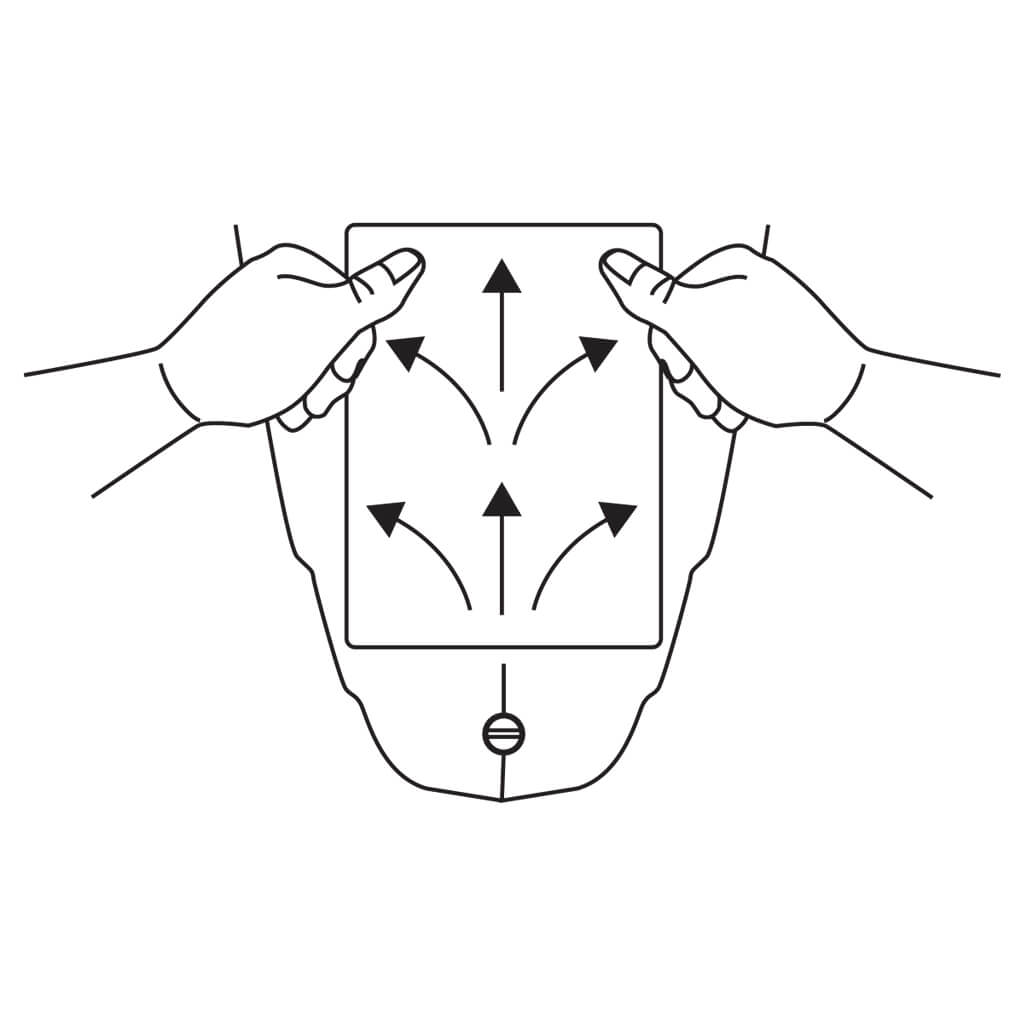
VersaTraction™ Step 4
Remove remaining easy peel backing while smoothing down traction from edge to edge until traction is secure on surface.
VersaTraction™ / Kahuna Grip™ Tread Installation
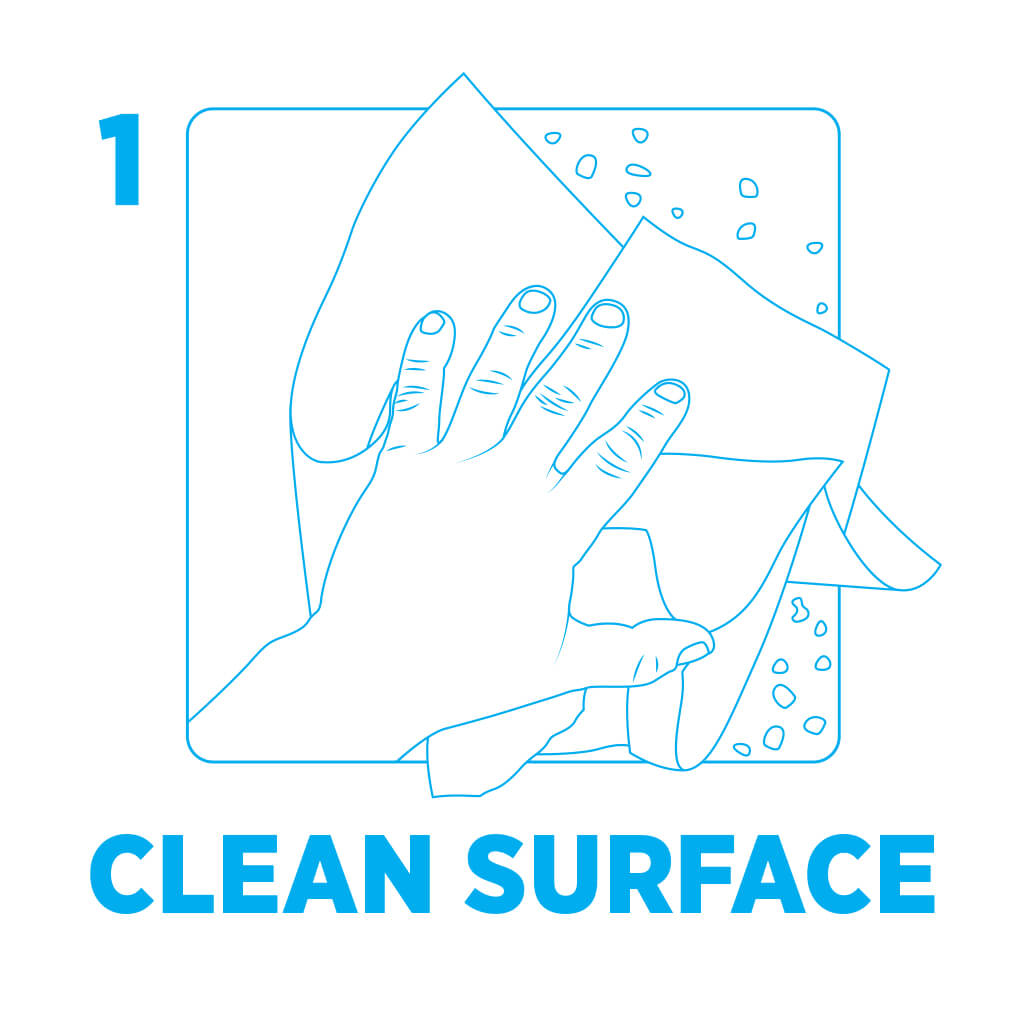
With a clean towel/rag, clean surface removing all oil, dirt, wax, and grease. Then dry using towel/rag, make sure area has no residue present.
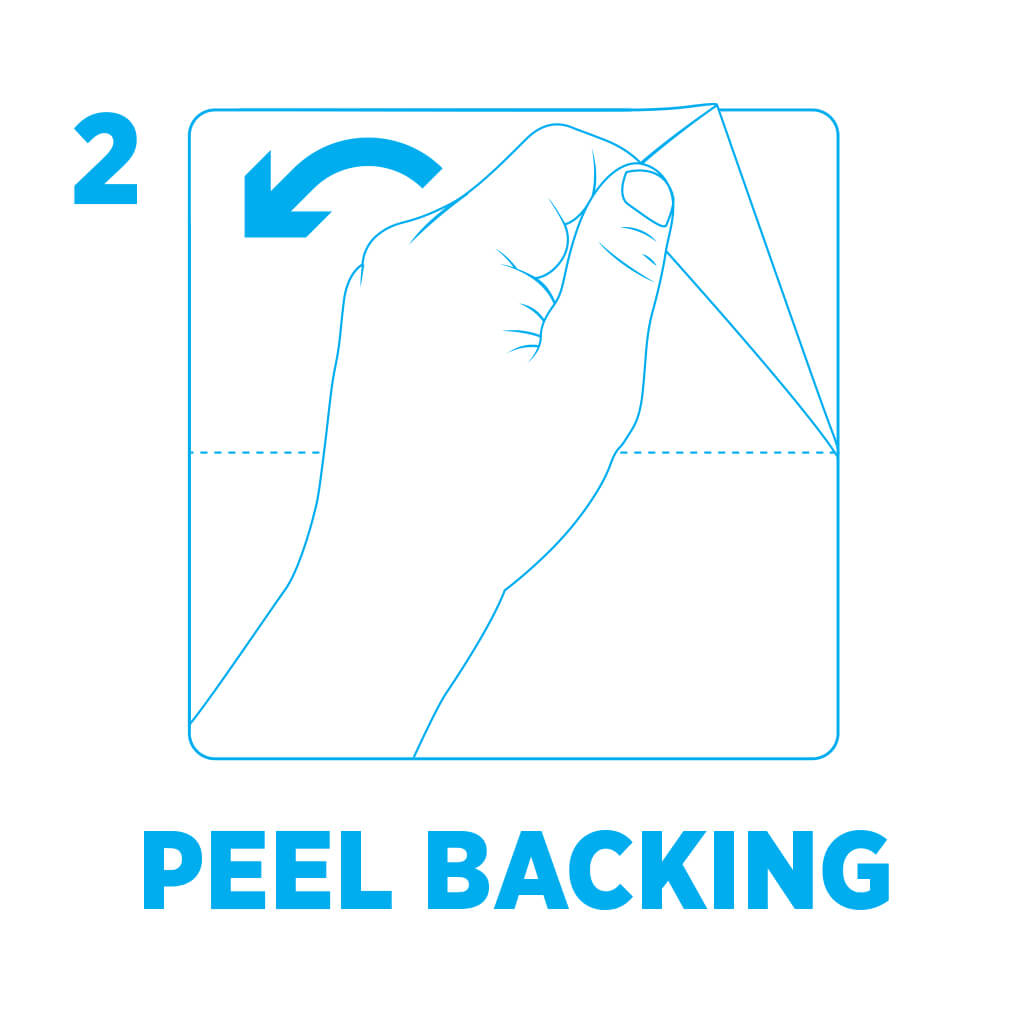
Peel backing of “easy peel” paper backing.
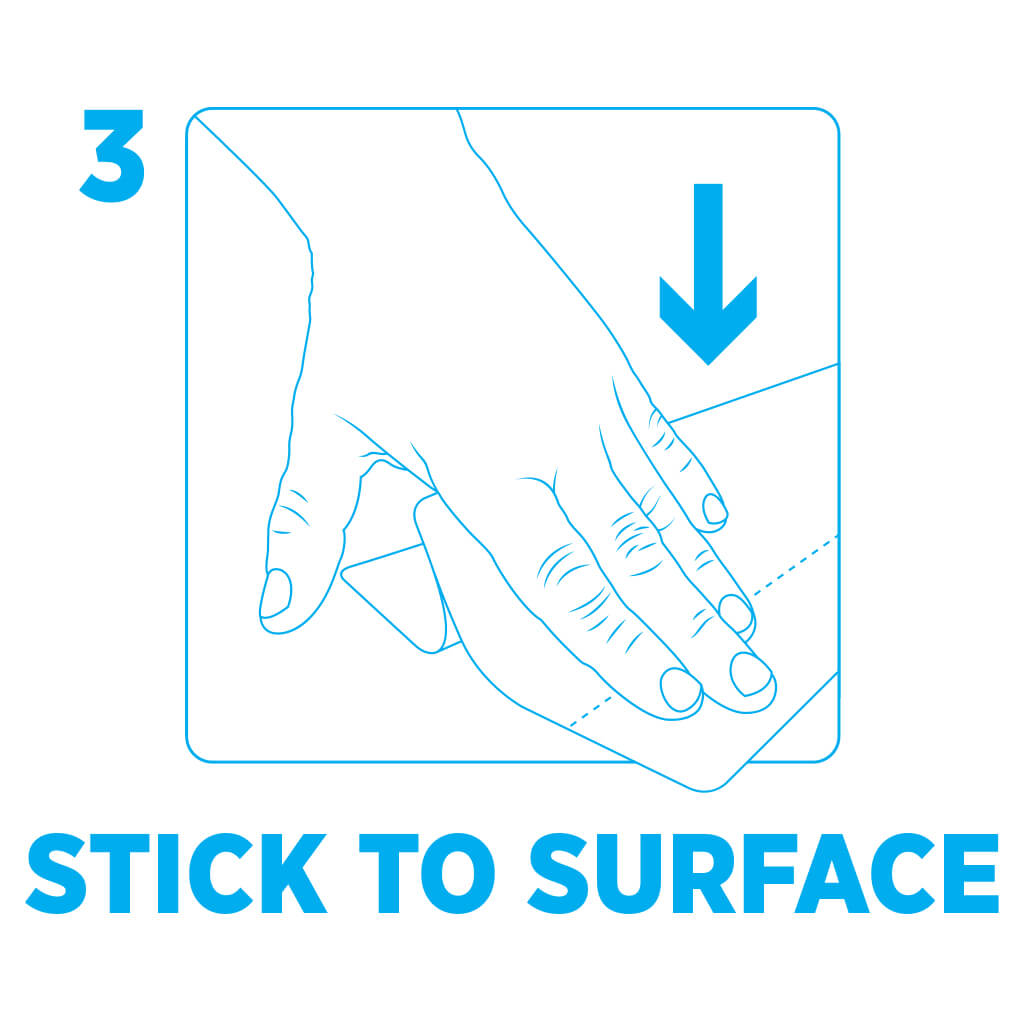
Stick to surface by placing exposed adhesive side down. Press downward in place.
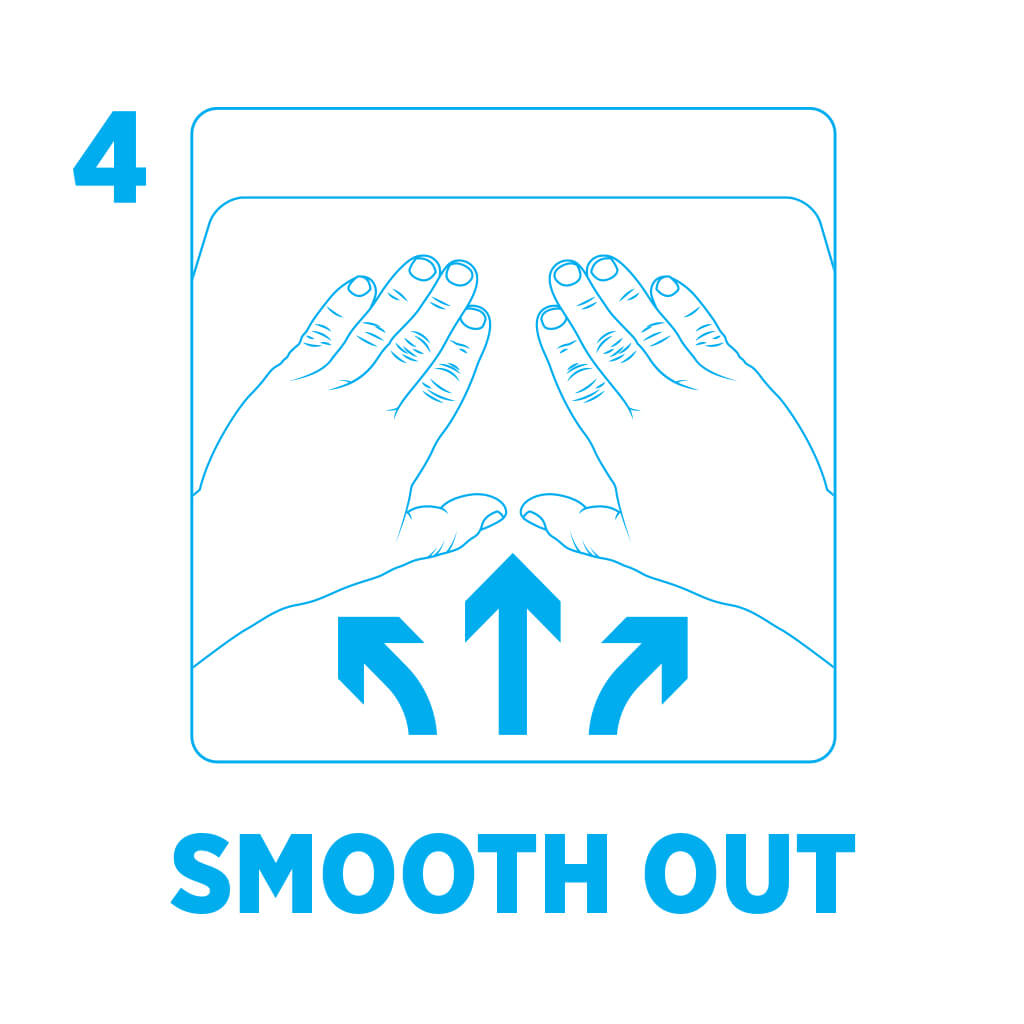
Remove remaining “easy peel” backing and smooth out traction from edge to edge until traction is secure on surface.
Kahuna Grip™ Bathmat Installation
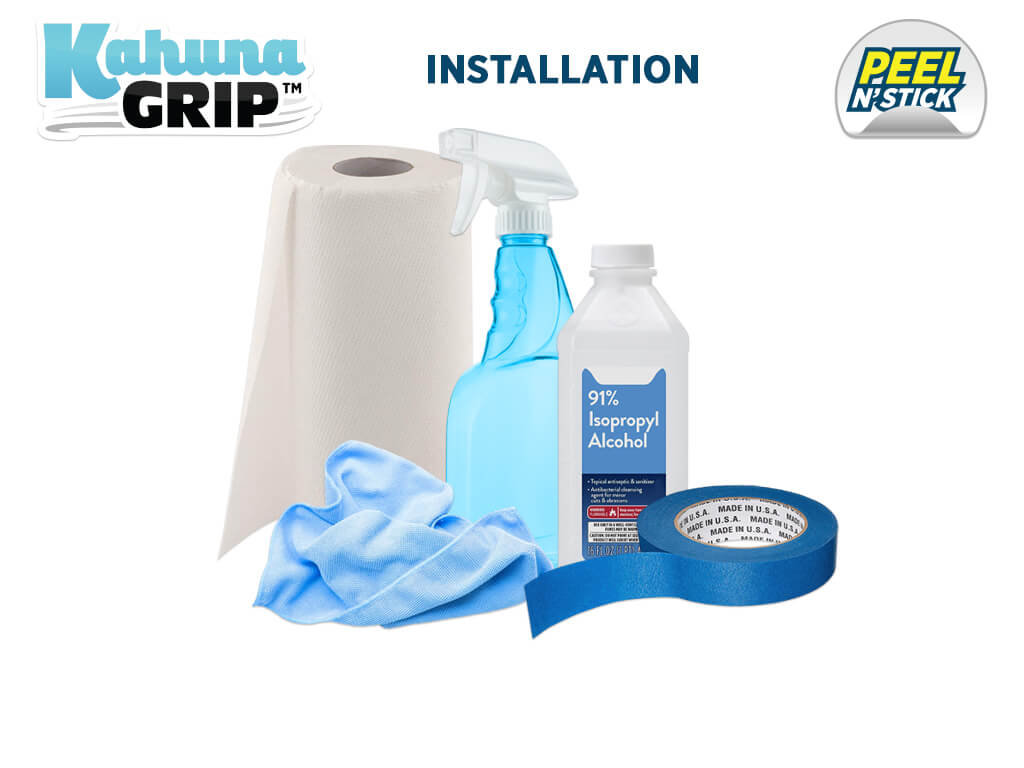
Supplies
Clean rag, cloth or paper towels, glass cleaner, rubbing alcohol, and masking tape.

Step 1
With a clean towel or rag. Clean the bathtub surface removing all soap scum, oil, dirt, wax, and grease. Make sure the bathtub surface area has no residue present. It is best to clean the surface one or more times, finishing with a final clean using rubbing alcohol. This will help ensure the best adhesion to the bathtub surface. Make sure the surface is completely dry before applying your Kahuna Grip™ bathtub mat.
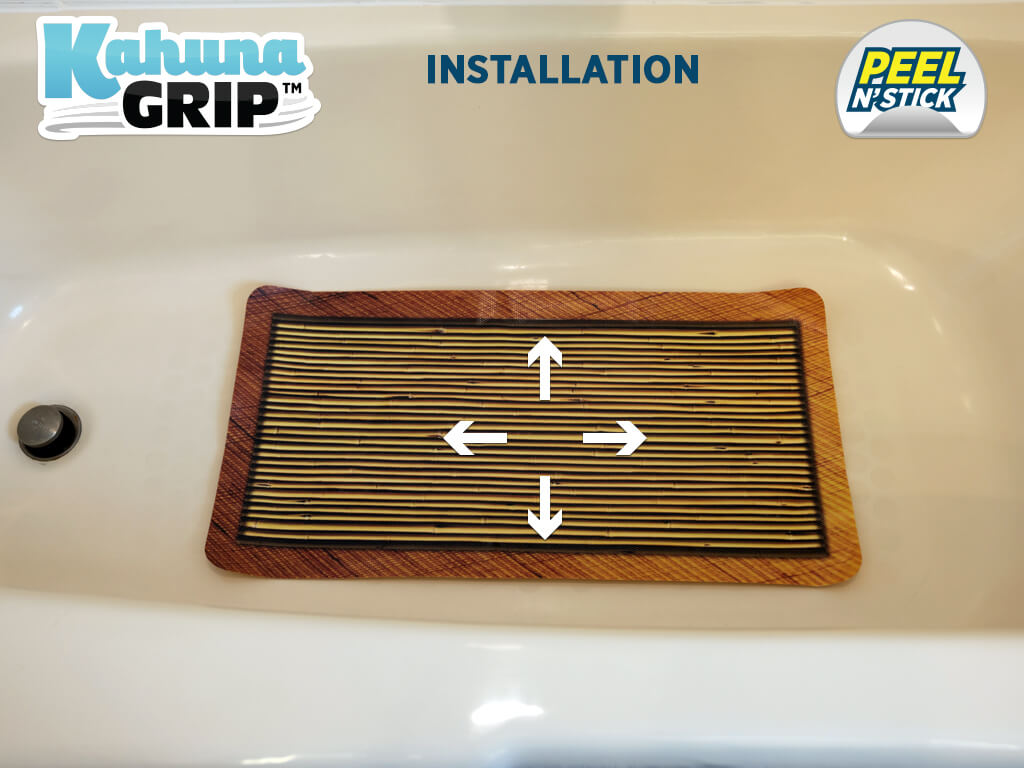
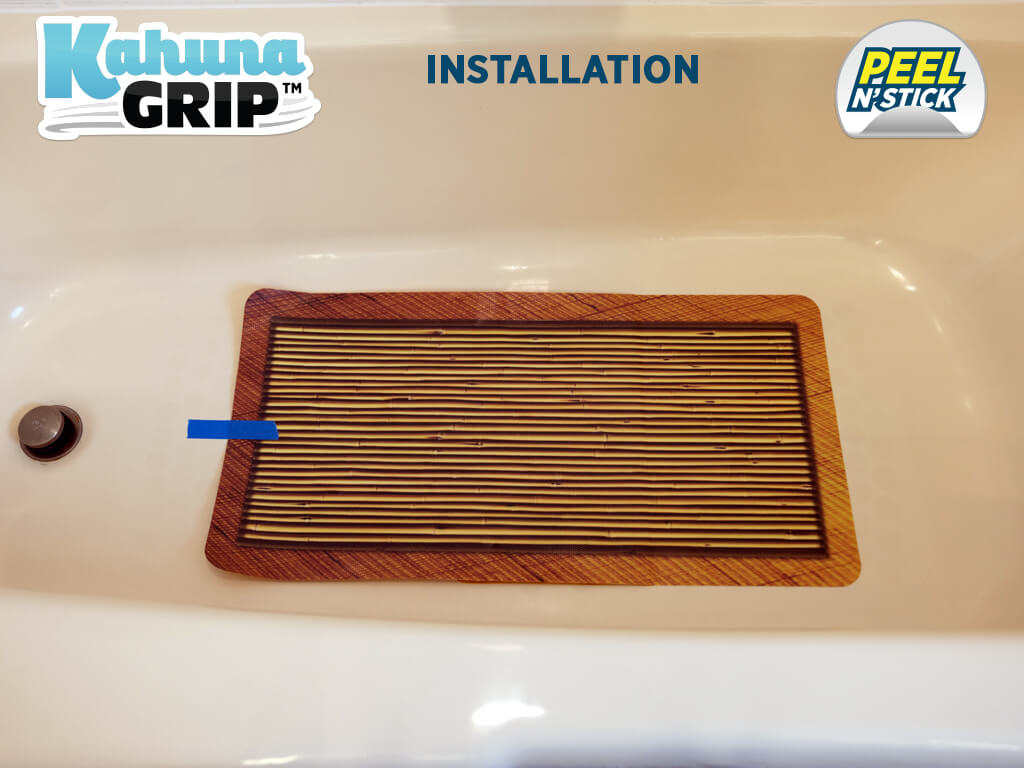
Step 2
Unroll your Kahuna Grip™ bathtub mat, lay flat on tub surface and position in bathtub.
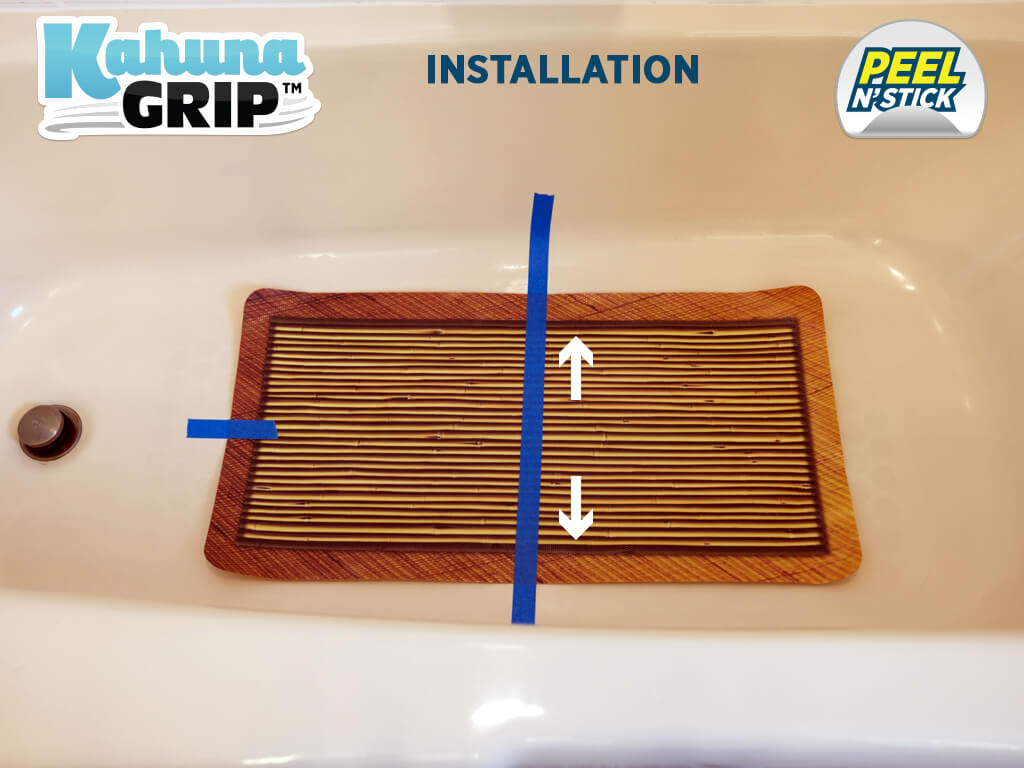
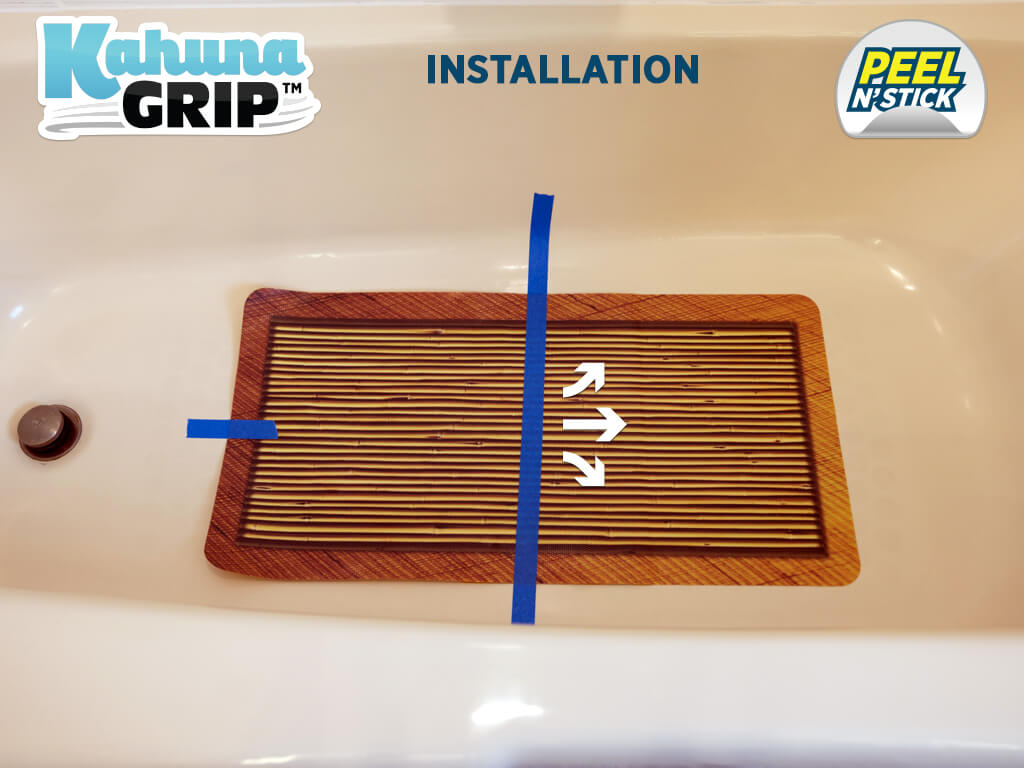
Step 3
Secure Kahuna Grip™ bathtub mat to tub using masking tape. Place masking tape across short side of your Kahuna Grip™ bathtub mat. Use an extra piece of tape to help stop the mat from rolling up during installation.
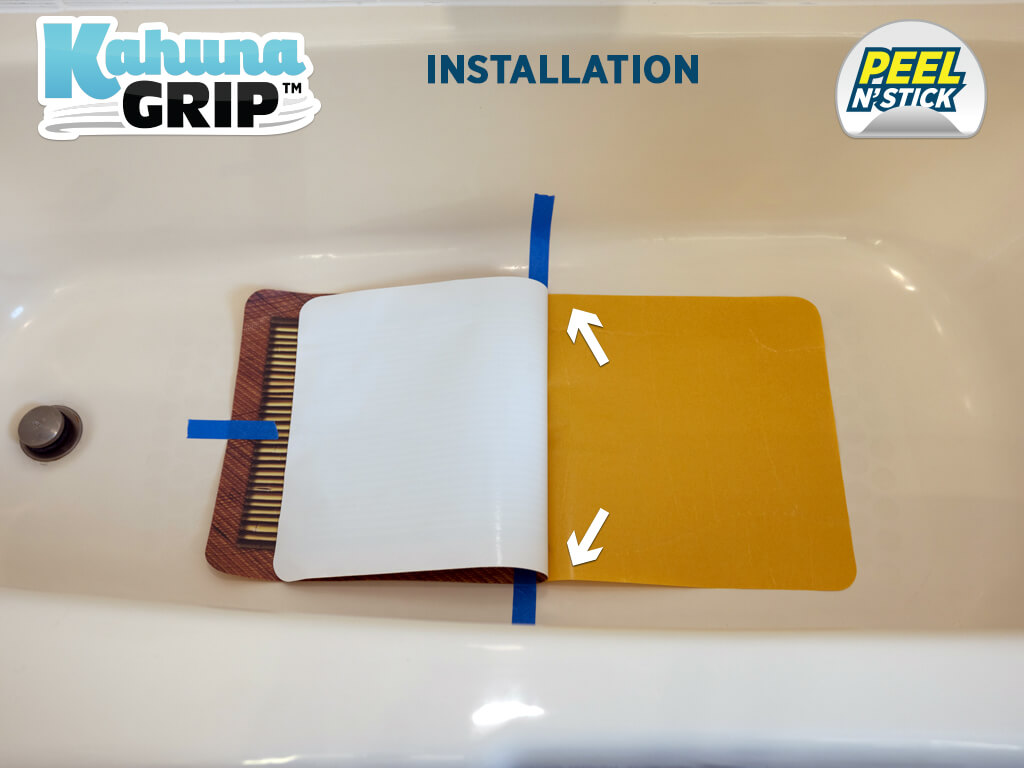
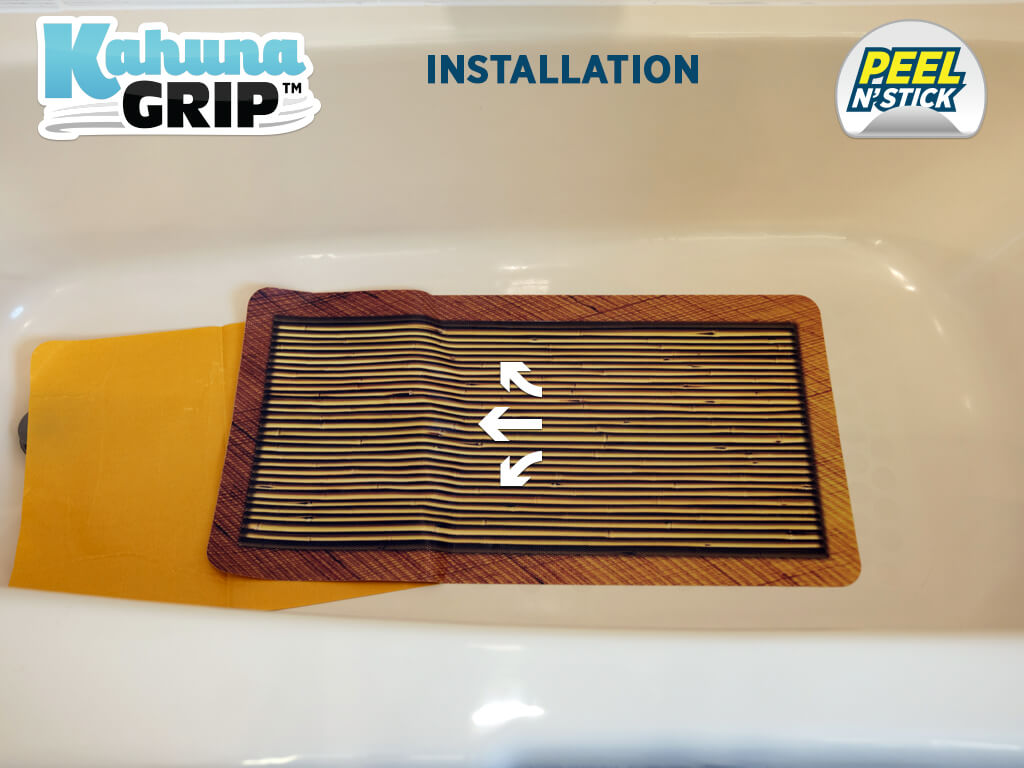
Step 4
Peel Kahuna Grip™ bathtub mat back from adhesive backing. Gently fold back your Kahuna Grip™ bathtub mat without creasing. Avoid touching the adhesive side of the mat as much as possible.

Step 5
Fold adhesive backing and tuck under your Kahuna Grip™ bathtub mat. Fold back adhesive backing as close to tape as possible without going past masking tape. Avoid touching the adhesive side of the mat as much as possible during installation.
Step 6
Carefully fold mat back over without letting it stick to surface. Working from the center of your Kahuna Grip™ bathtub mat outwards using your other hand. Rub your Kahuna Grip™ bathtub mat down to surface of tub.
Step 7
Remove masking tape from Kahuna Grip™ bathtub mat.
Step 8
Pull folded adhesive backing away from under your Kahuna Grip™ bathtub mat while rubbing mat to surface. Working from the center of your Kahuna Grip™ bathtub mat outward.

Step 9
Check that your entire Kahuna Grip™ bathtub mat is adhered to the surface. Hand wash and spot clean as needed. Enjoy your Kahuna Grip™ bathtub mat.